If you have a large, high resolution screen, you might notice that Windows 7 doesn't look so hot in places, such as the login screen background being very low resolution and suffering from JPG artifacts. Similarly, if you have decided to change the default user icon/avatar to something of your own, you might find that it looks a little blurry compared to the preinstalled icons.
Fortuantely in my fiddling and tweaking with Windows 7, I've come across some work arounds and information that will improve this situation.
Windows Login Icon
If it's one thing I like, it's a crisp image. It has been a habit of mine to make sure I get the dimensions right when creating avatars and icons to avoid them being rescaled. In fact, this is basic and you no doubt already take this into account when selecting or making desktop backgrounds.
I googled around at first to save myself the trouble of trial and error, but all information was pointing to the icon size being 128x128 pixels. I created my icon with those dimensions and it didn't look as sharp as the supplied icons - I could tell it was being rescaled. I managed to find a screenshot of the Windows 7 login screen and measured the dimensions of the user icon space in Photoshop.
It turns out the correct dimensions for the Windows 7 user icon at the login screen is 126x126 pixels. I'm now using a 126x126 PNG as my login icon, and it's pixel perfect, no rescaling anymore.
You might want to note that Windows Live Messenger uses 96x96 pixels icons and also accepts PNG.
Desktop Background
It actually wasn't until last night that I noticed this. I've been using a scan of some Ocarina of Time 3DS promotional art as my background for a while, and I found a high resolution PNG of it on the Nintendo E3 press site, so I decided to recreate it as the original had some weird artifacting around Ganondorf's hair despite the image being very good quality. I didn't know why and presumed they were scanning artifacts.
After I had cropped and downscaled the new image, I saved it as PNG and applied it, but the weird thing was is that my recreated image didn't look as good as the image I was replacing. If anything, Ganondorf's hair looked worse now than before, and I thought I saw some JPG artifacts around Link's ear. That set some gears turning upstairs, so I pulled up the original PNG in window and compared them.
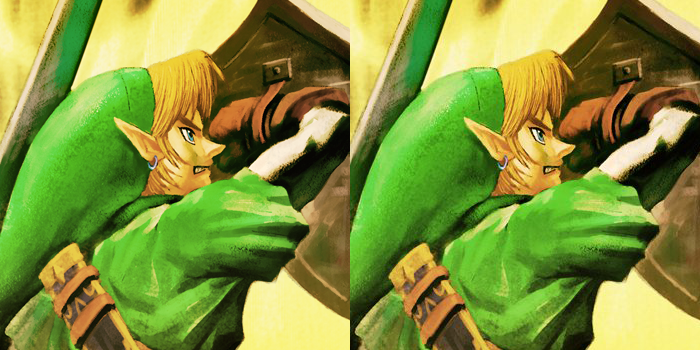 |
| Left: Original PNG, Right: Original when set as wallpaper in Windows 7. Notice the artifacts around his ear. |
Sure enough the background appeared to have JPG artifacts and was evidently lower quality than the source file despite the fact that the source was a PNG. It turns out that Windows 7 converts BMP and PNG wallpapers to JPG, and after a quick google, I found it stores them in "%appdata%\Microsoft\Windows\Themes" (paste that into an explorer window, or press the Windows key and R and paste it in there).
 |
| Saturated colours are a huge giveaway. Who at Microsoft thought it would be a good idea to convert lossless wallpapers into JPG of this quality? |
Method 1
Windows will recompress BMP and PNG images to a lower quality JPG, but it does not recompress images that are already in the JPG format, it simply copies it to the themes folder in %appdata%. Open your BMP or PNG wallpaper in something like Adobe Photoshop or GIMP if you need a free alternative, and save it as JPG using the highest quality setting. It's not lossless, but it's so good I doubt you will be able to tell the difference. Apply the wallpaper in the usual way.
Method 2
This method will allow you to use a lossless background (eg BMP or PNG) without ever converting it to JPG. Just get your image, drop it into an open Firefox window, then right click and choose Set As Desktop Background. The only real down side to this is that Firefox converts it to a 32 bit BMP, which uses around 8MB for 1080p. Ouch.

Microsoft, if people select BMP or PNG as a desktop background it's because they want a lossless image. Don't go around compressing it to a shitty JPG. My computer is supposed to do as I tell it to, not what someone else thinks is good.
Replacing the Login Screen Background
When I was testing the Windows 7 RC, I noticed that the login screen background was horribly stretched and full of JPG artifacts. It irritated me, but I let it slide, and assumed they would put lossless backgrounds in for the retail version. Well it didn't happen. When I bought my Vaio at the beginning of 2011, it was the first time I had used a full retail version of Windows 7, and I was surprised to see the same low quality background. It felt like a downgrade, because Vista certainly didn't have JPG artifacts, and I'm pretty sure the Windows XP login, as simple as it was, didn't suffer any quality issues either.
But one day my sister got a new laptop and to my surprise it had its own branded login screen. The quality was really good too. This gave me hope. I had previously not even considered the possibility of changing the login background because I presumed it would be hidden deep within the system files and be tied up within a DLL, a locked file or something that wouldn't be worth the effort changing.
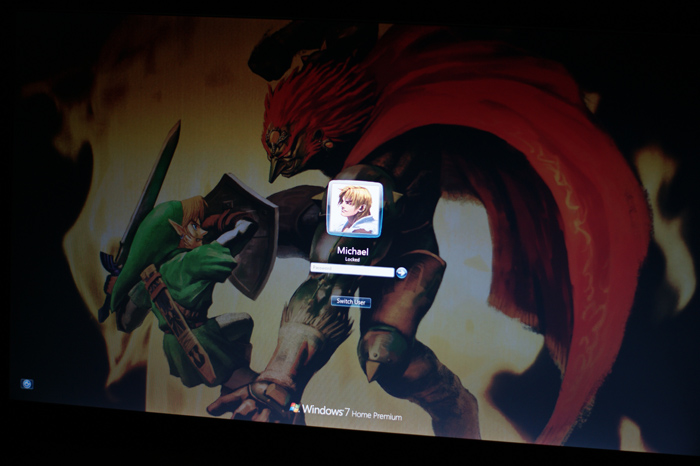 |
| One of the workarounds for the low filesize limitation is to decrease the brightness of the image. |
I googled it anyway and it turns out it's stupidly easy to change the login background, however there are a couple of limitations:
- The image type must be JPG
- The file size must not exceed 249KB (256,000 bytes)
- Must be named backgroundDefault.jpg
How to use a Custom Login Background
1) The first thing you need to do is download this registry entry. You may need to show the file extensions in Explorer and delete the .txt that mediafire seems to have added to it (so it ends in .reg). Double click to add it to the registry (or right click and select merge). This tells Windows 7 to prefer custom backgrounds over the OEM background.
2) Open an explorer window and navigate to C:\Windows\System32\oobe\ At this point you may need to create another couple of folders if they don't already exist. Right click and make a new folder called info within the oobe folder. Open the info folder and make another folder in that called backgrounds. Once you open the backgrounds folder, your path should read C:\Windows\System32\oobe\info\backgrounds
3) At this point we need to prepare/compress the image. To prevent scaling of the image (which is what gives the default login background that pixelated appearance), you need to make sure the image is the same resolution as your display. Right click your desktop and select screen resolution to find out the dimensions of your display, and match these dimensions if you are downscaling or cropping an image in your photo editing software. If your image is smaller than your display, it is generally better to upscale it in your photo editing program than let Windows do it.
When you have the image at the correct resolution, it's time to compress it. We need to get the filesize under 249KB, but at the same time squeeze every last bit of quality out that we can.
For Photoshop:
To save the file, click File > Save for Web & Devices. This gives us much finer control over the JPG quality levels than the usual JPG export under File > Save As. Select the Optimized tab to see a preview of your compressed image and then pick JPEG high from the presets in the top right corner.
 |
| The Photoshop Save for Web and Devices export screen |
Taking note of the filesize in the lower left hand corner of the window, adjust the value in the quality setting (in the top right) until you get close to 245-250KB. You can also experiment by checking and unchecking Optimized and Progressive as these will usually save you 5-10KB for free. If embed colour profile is checked, uncheck it. When you have reached your target filesize, hit save and put it on the desktop for now.
For GIMP:
To save the file in GIMP, click File > Save As. In the save dialog that pops up, change the extension to .jpg and press enter (just save to the desktop for now). This will take you to the JPEG compression options. It's similar to Photoshop in that you have a quality slider with fine control over the amount of compression.
Check the box that says Show preview in image window. This will enable a preview of the image quality after compression, but more importantly the filesize. Move the slider left or right until you get to around 245-250KB. You can expand Advanced Options to gain access to things like Optimise and Progressive which will save a few KB without affecting the image quality. There are also advanced options such as subsampling which controls how the colour is encoded. If you are saving a JPG to use as a desktop background like earlier, I'd suggest using the highest quality level, and setting the subsampling to 1x1,1x1,1x1, but for the purpose of the login background, you might want to experiment with the other subsampling options.
4) Once you have your compressed image, it's time to move it to the C:\Windows\System32\oobe\info\backgrounds directory. The image should be named backgroundDefault.jpg.
Providing you applied the registry entry successfully and got the filesize small enough, your custom login background should now show when you Ctrl Alt Del or lock your system with Windows key and L. If the background does not show, you might need to reboot. If it still doesn't work after that, compress your image so it's a little smaller (I read the limit is 256KB, but it appears to be closer to 249KB or 256,000 bytes.
Once the registry entry is applied, you can change the backgrounds in real time without reboots by just changing out the image stored in the backgrounds folder as long as it has the same name. If it doesn't show, it's likely to be a filesize issue or the JPG settings (eg Windows doesn't like the subsampling or optimisations the program uses).
Disabling the Boot Logo
I had used Windows 7 on a 4:3 laptop (1400x1050) for quite a long time, maybe over a year, so imagine how many times I have seen the boot logo. Well now that I have a widescreen laptop, that boot logo simply annoys me. Why? Because it's the wrong aspect ratio. Apparently Microsoft can cram their OS with 10GB of redundant crap, but they can't be bothered to put in a boot logo for widescreens.
It's not as if widescreens are anything new either, and they are only becoming more popular as time goes on. Well there isn't really a fix for this, aside from unpacking a system file and resizing 105 or so images. It's just not worth the time (even if I automate it) and not worth the risk of screwing something up.
So my solution is to not look at it at all, and here's how you can do the same.
1) Press the Windows key and R.
2) Type msconfig and hit enter.
3) Go to the boot tab and check No GUI boot
4) Click Ok to confirm
Now the next time your computer boots, it just shows you a black screen (with some weird little dotted lines in the top left corner as it loads). I found that skipping the boot animation speeded up my boot by about 5 seconds, so it's a win-win.
The only downside to this is that I rebooted to run a surface scan on my HDD once, and because the GUI did not load, it just ran the scan with nothing on screen so I had no idea what point it was at. That wasn't too bad since the program was automated, but it might cause some problems if you ever require user input.
No comments:
Post a Comment